
Last updated on September 30, 2026
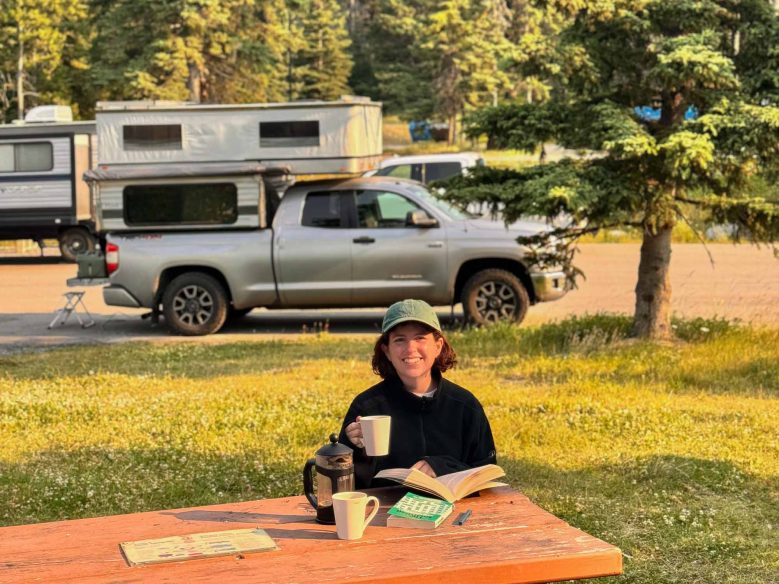
Before planning our Canada road trip, I had no idea getting a campsite in the Canadian Rockies is as competitive as getting Glastonbury tickets.
At one point, I had five devices open and my place in the queue ranged from 500 to 30,000 on each one!
This isn’t something that’s easy to do on a whim. Reservations for Parks Canada campgrounds open months in advance, and the most sought-after spots can disappear in minutes.
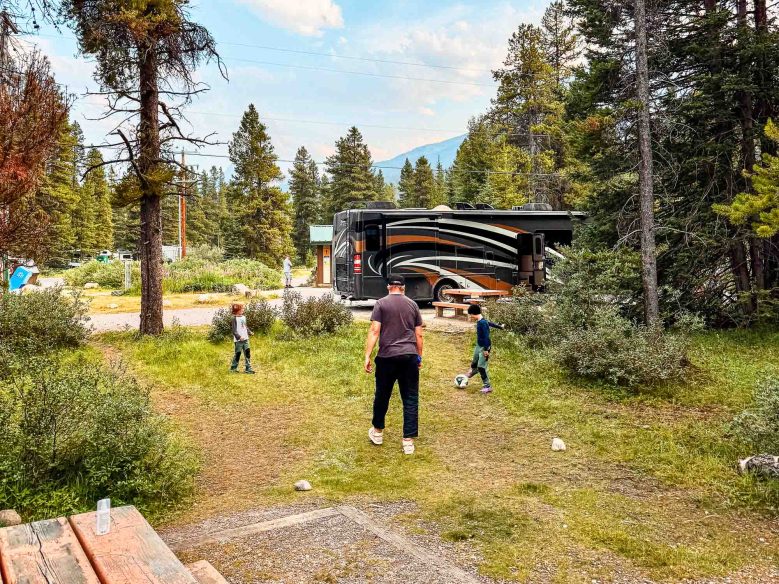
But the stress was worth it. We managed to camp surrounded by some of the most spectacular scenery of our entire Canadian Rockies road trip, including stays in Banff, Lake Louise and Yoho national parks.
The Parks Canada reservation system isn’t especially complicated once you understand it, but launch day is intense and there are a few things that can make a huge difference. This guide explains exactly how to book a Parks Canada campsite, how the random queue works and what to do if your first choice has already gone.
Important: Launch dates, fees, campground operating periods and reservation rules can change each year. This post explains the process, but always check the current details on the official Parks Canada reservation page before booking.
Do you need to reserve campsites in Canada’s national parks?
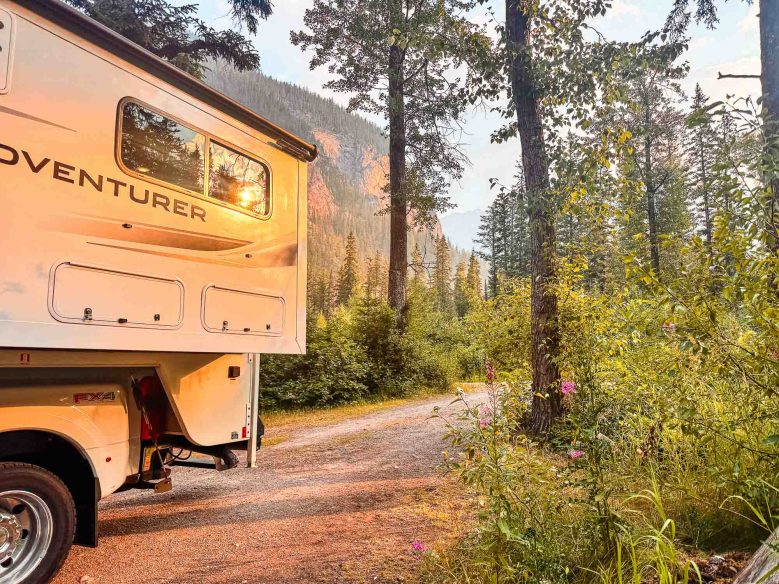
Not every Parks Canada campground is reservable, but most of the popular frontcountry campgrounds are, including the headline options in Banff, Jasper, Yoho and Kootenay national parks.
While cancellations do come up, for the most sought-after campgrounds, booking ahead is by far the least stressful option. It gives you a guaranteed place to sleep and allows you to plan the rest of your route around it. This is particularly important when travelling in an RV, when you may need a specific pitch length, an electrical hookup or a hard-sided campground.
Camping inside a national park is only permitted in designated camping areas. This includes sleeping in a car, campervan or RV, so you can’t simply stay overnight at a viewpoint, trailhead or roadside pullout if the campgrounds are full.
Some Parks Canada campgrounds have first-come, first-served pitches, which I cover later in this guide. But in popular areas, I wouldn’t rely on one as your only plan.
When do Parks Canada camping reservations open?
Every national park has its own reservation launch day, usually in January or February for the whole summer season. Some parks also have different launches for frontcountry camping, backcountry camping, roofed accommodation and activities.
This isn’t a rolling system where you book a set number of months before your stay. On launch day, the entire reservable season for that location becomes available at once.
The dates and times normally appear on the Parks Canada website before launch season. Check the current Parks Canada reservation dates and make a note of every launch relevant to your route.
Pay close attention to the time zone. The launch time is based on the local time at the park, not where you live. This is especially important for international visitors and anyone booking parks across different Canadian provinces. I was in Austria and then Morocco when booking ours!
Parks Canada camping terms worth understanding
You don’t need to memorise a dictionary of camping terminology, but these are the terms that are useful to know when choosing a pitch:
- Frontcountry camping: A campground you can reach by road, normally with a parking space at or close to the pitch.
- Backcountry camping: Campsites reached on foot, by boat or sometimes on horseback! These have a different booking process and may have separate launch dates.
- Unserviced campsite: A pitch without individual electricity, water or sewer connections. The wider campground may still have toilets, showers, drinking water and a sani-dump.
- Serviced campsite: A pitch with one or more hookups, such as electricity, water or sewer. Check the description carefully because “serviced” doesn’t always mean all three.
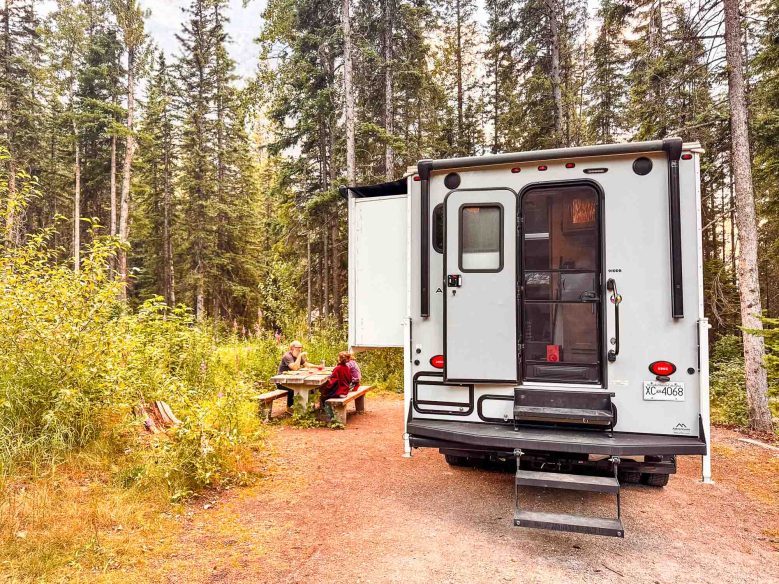
- Hard-sided equipment: An RV, motorhome, campervan or other solid-sided camping vehicle. Some campgrounds restrict soft-sided trailers and tents because of wildlife activity. This includes pop-up on campervans. Our truck camper had a hard sided slide-out, so was still considered hard-sided overall.
- Soft-sided equipment: Tents, tent trailers and other equipment with fabric sides.
- oTENTik or roofed accommodation: Parks Canada’s ready-made accommodation, usually a sort of safari tent set-up.
- Operating season: The full period when a campground is open.
- Reservable period: The dates within that operating season that can be booked online. Some sites may operate first-come, first-served outside this period.
- Allowed equipment: The type and maximum size of tent, trailer or RV permitted on an individual pitch.
- Loop: A named, lettered or numbered section within a larger campground containing a group of pitches. It’s important to know which loop you’re aiming for when booking sites.
The equipment rules are important. Don’t book a shorter pitch and hope your RV will fit, and don’t assume every campground accepts every type of setup.
How to prepare before Parks Canada launch day
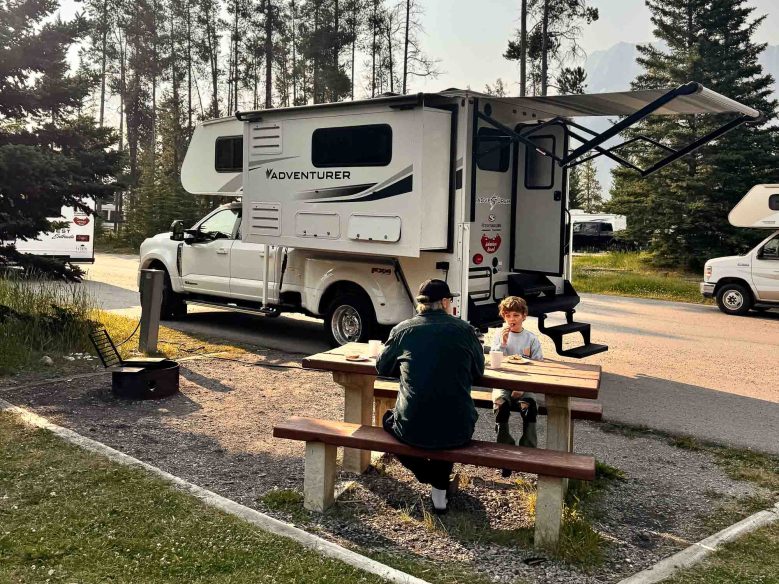
Preparation is what gives you the best chance of success. You don’t want to reach the front of the queue and start comparing campground maps for the first time.
1. Create your Parks Canada account
Create and confirm your Parks Canada Reservation Service account well before launch day. You’ll need a unique email address for the account and can currently sign in using Google, Facebook, GCKey or one of the listed Canadian banking partners.
If you haven’t made a Parks Canada reservation since March 2023, you may need to create a new account. Test the login before launch morning so you aren’t trying to reset a password while campsites disappear.
2. Know exactly what you need
Before looking at individual campsites, write down:
- Your travel dates
- The number of adults and children
- Your camping equipment
- Your vehicle or RV length
- Whether you need electricity, water or sewer
- Whether you require a hard-sided site
- Whether having a fire pit matters to you
This will stop you wasting time on pitches that don’t work for your family or vehicle.
3. Study the campground maps
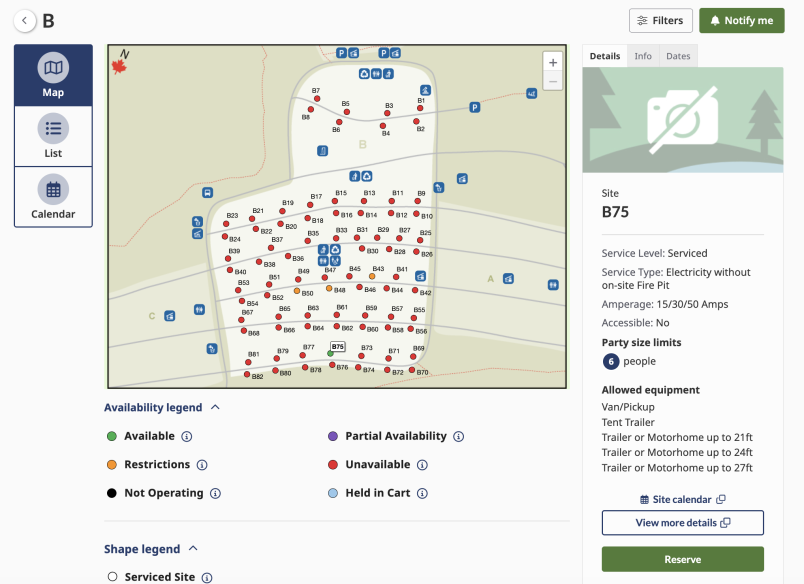
Decide which campground you want, then look at the individual loops and site descriptions. Check the pitch length, permitted equipment, hookups, fire-pit information and location of facilities.
Make a shortlist rather than aiming for one perfect pitch. On a busy launch day, being willing to book anywhere suitable within a campground can be far more useful than trying to secure one precise site number.
4. Have backup campsites and dates ready
Being flexible gives you a much better chance of securing your trip. Prepare alternatives in this order:
- Different sites within your preferred campground
- Different loops within that campground
- A nearby campground in the same park
- Slightly different dates
- A campground in a neighbouring national park or town
Write the options down in priority order so you don’t have to make a complicated decision under pressure.
5. Have your payment card ready
Have a valid payment card beside you and check the expiry date. Don’t assume your browser has stored the correct details (I get glitches on this a lot!)
6. Use a computer if possible
The system works on mobile, but the campground maps and comparisons are easier to navigate on a laptop or desktop. I used phones and tablets to join additional queues, but I preferred doing the initial research on a laptop.
How the Parks Canada virtual queue works
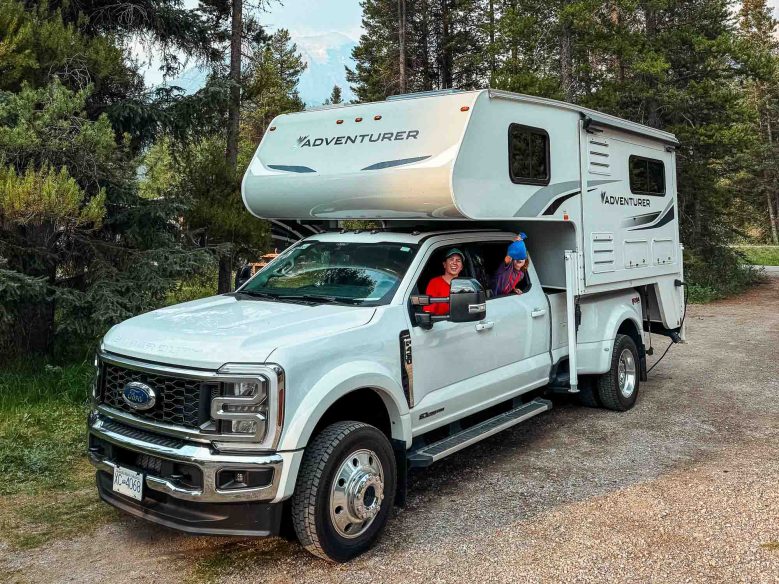
Parks Canada uses a virtual queue for the busiest launches, but not every launch has one. The current launch-date table says when a queue is planned.
If a queue is being used:
1. The waiting room opens 30 minutes before reservations go live.
2. Anyone visiting the reservation website during that period is directed to the waiting page.
3. At the exact launch time, everyone in the waiting room is randomly assigned a position.
4. Your position is not based on how early you entered during that 30-minute window.
5. Anyone arriving after the launch time joins the back of the queue.
6. When your turn arrives, an on-screen message appears and you have 30 minutes to proceed to the reservation website.
Don’t refresh the waiting-room or queue page unless Parks Canada specifically tells you to. You don’t want to risk losing your assigned session (although I did do this accidentally on one device and it luckily still took me back to the position I was in).
If a launch doesn’t use a queue, everyone can access the booking system when reservations open. In that situation, knowing exactly what you want is even more important.
Can you join the Parks Canada queue on multiple devices?
I joined the waiting room on five different devices and got queue positions ranging from 500 to over 30,000. It wasn’t based on when I joined, so the allocation really is random.
Five devices might sound excessive, but it can make all the difference – it definitely did for me! Each queue session gave me another random chance of receiving a useful position. Without doing that, I might have missed out on some of the more high-demand sites.
Once the queue numbers appeared, I concentrated on the device with the best position. Keep track of what is happening on each screen and avoid making conflicting or duplicate reservations in the panic.
Using several devices doesn’t guarantee a campsite and the queue system may change in future seasons, but think of it as stacking the odds slightly in your favour rather than finding a loophole.
How to book a Parks Canada campsite online
Once you reach the reservation website:
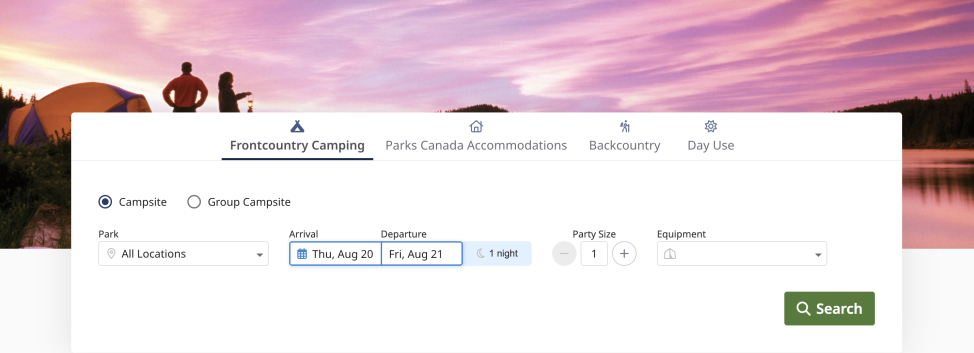
1. Choose the appropriate booking type, such as frontcountry camping, backcountry camping or accommodation from the tabs at the top.
2. Select the national park.
3. Enter your arrival and departure dates, party size and camping equipment. Press search.
4. On the next page. Apply any essential filters, such as electrical hookups or firepits.
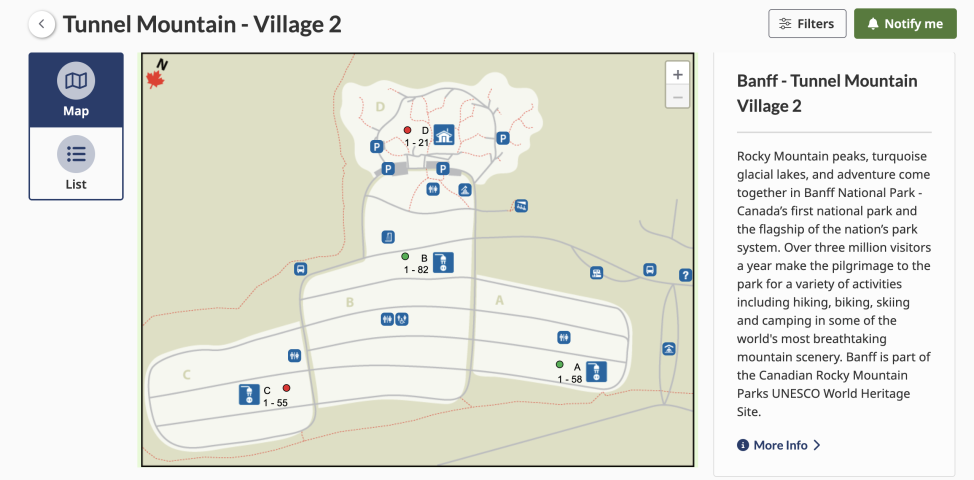
5. Check the available campsites using the list or map view. I prefer the map, which has an easy-to-read colour-coded system. On booking day, you can quickly see if there’s no room left in an entire campsite as it’ll be marked red.

6. Select your preferred campsite and then click through to your preferred loop. Again, this will be colour-coded so you know what’s worth clicking into.
7. Select the pitch you want, carefully check its requirements/facilities, and hit ‘reserve’.
8. Check and confirm the reservation details.
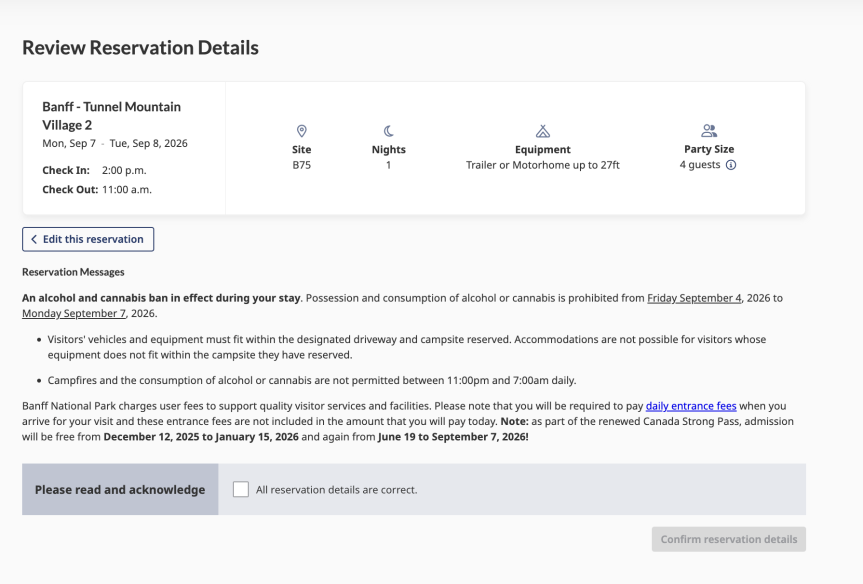
9. The reservation should now be secure in your cart. Add any other reservations you need or proceed to the checkout.
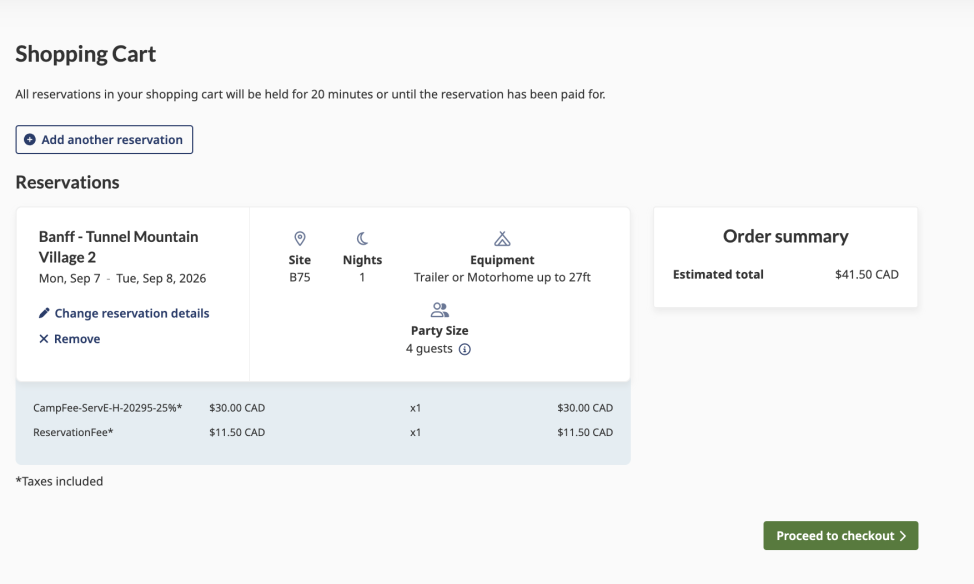
10. Check all the details before paying.
11. Complete payment and wait for the confirmation page and email.
Note that while your site should be held in your cart, your campsite is only 100% secured once the reservation has been completed. If there are sites you’re particularly keen on on reservation day, it could be worth paying for those straight away and then going back to book the others. You won’t have to rejoin the queue and will still have access to the booking system (the queue is to get onto the reservation site).
Book strategically across different national parks
Reservation dates vary between parks, and you can use that to create a backup plan.
For our Canadian Rockies trip, Yoho bookings opened before the Banff campground launch containing Lake Louise. I reserved a campsite in Field, around 30 minutes from Lake Louise, as a backup. Once I’d secured our Lake Louise campsite, I cancelled the Yoho booking.
That meant we never risked being left without anywhere suitable to stay. However, every completed reservation has associated transaction costs, and changes or cancellations can incur another fee. Check the current policy and decide whether the peace of mind is worth that potential expense. For us it cost CAD$11.50 to cancel a booking.
This strategy works best when the backup is somewhere you would genuinely be happy to stay. Field and Yoho National Park were hardly a disappointing second choice, and we actually stayed in Field for one night straight after Lake Louise.
Another thing to note is that you can’t make a reservation under the same name for the same night. I had to book in Steve’s name for the Lake Louise site and then go back and cancel the Field one. And for another one, I had to book under my son’s name who is only 8! When we checked in at the campsite, they didn’t ask for the name or ID (just the booking number) so this wasn’t a problem.
What if your preferred campsite has already gone?
Don’t assume it’s over as soon as your first search comes back empty.
Check the individual Site Calendar
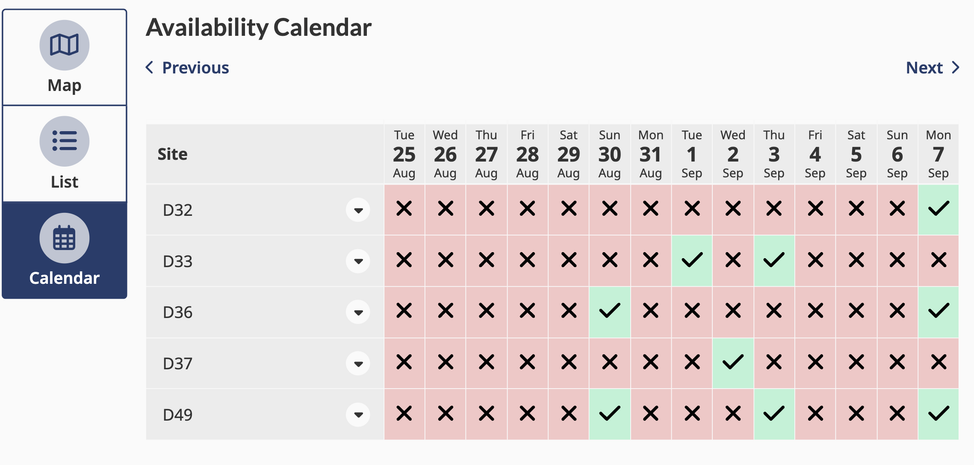
Open the campsite description and select Site Calendar to see its availability across the month. Moving the trip by a day or two may solve the problem.
Use the campground Calendar
At the final loop level for each campsite (where you can see individual pitches), you can use the Calendar button to compare availability across multiple pitches. This is much faster than opening every site separately.
Split your stay across different sites
If no single pitch is available for your entire stay, select Split your stay across sites. Moving pitch partway through isn’t ideal as there’s normally a gap between check-in and check-out time, but it may be better than losing the campground entirely.
Zoom out and try another campground
Use the map navigation to look at other loops, campgrounds and nearby parks. This is where your prepared backup list becomes invaluable.
Keep checking during and after launch day
Availability can reappear when people abandon unfinished bookings or change their plans. If you miss out initially, continue checking rather than assuming every site has gone for the whole season.
How to find Parks Canada campsite cancellations
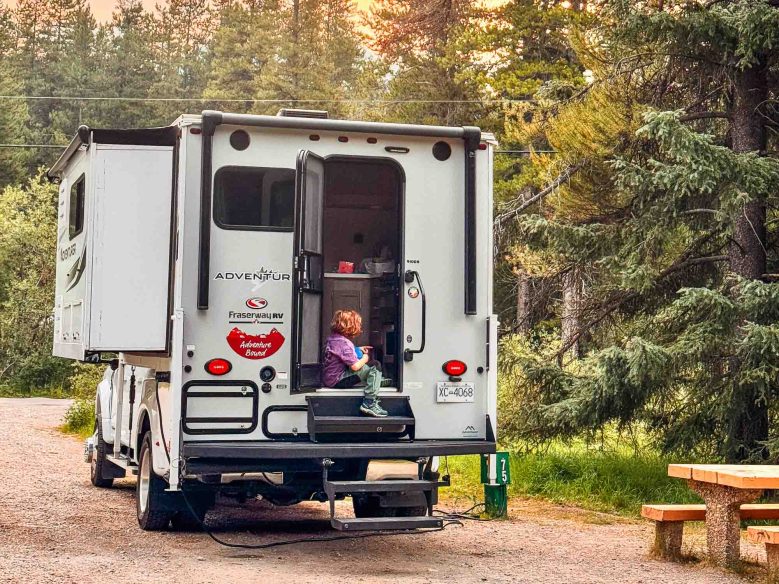
Missed out? Don’t panic. Cancellations happen all the time, particularly because people reserve so many months before travelling.
Use Parks Canada’s availability notifications
Parks Canada has a free Notify me function for eligible frontcountry campsites and overnight accommodation.
To create one:
1. Sign in and search using your dates, party and equipment.
2. Open the campground you want.
3. Select Notify me when no suitable campsite is available.
4. Check the criteria and save the notification.
5. Manage saved alerts under My notifications in your account.
You can create multiple notifications. But an alert doesn’t reserve the site, and other people may receive the same email, so act quickly.
Check manually
Regularly repeating your search can still work, especially in the weeks immediately before your trip when plans and weather forecasts change.
Consider a third-party campsite scanner
Paid services can monitor availability and send alerts, including for some bookings not covered by Parks Canada’s own system. Check exactly what the service monitors and remember that an alert still doesn’t guarantee you’ll complete the booking first.
Ask about last-minute availability
Campground staff or a visitor centre may be able to tell you about last-minute availability, but I wouldn’t arrive in a busy national park without a backup outside the park boundaries.
How do first-come, first-served Parks Canada campsites work?
Some campgrounds have pitches that can’t be reserved and are allocated to whoever arrives first. Others may switch to first-come, first-served operation outside their reservable period but while the campground remains open.
Check the current information for the individual park rather than relying on an old list. Availability is never guaranteed, particularly in the Canadian Rockies during summer.
If you plan to use one:
- Arrive with plenty of time and preferably around the campground’s normal turnover period.
- Understand how permits and payment are handled at that location.
- Carry an alternative campground plan.
- Be prepared to travel outside the national park if it is full.
Our Canadian Rockies campground booking strategy
For our three-week road trip, I treated the campgrounds as the fixed points of the itinerary and built the route around them.
Our priorities included:
- Two Jack Lakeside, one of Banff’s most competitive campgrounds
- Tunnel Mountain Village, a practical Banff base with great views and Roam Transit into town
- Lake Louise Hard-sided, which suited our truck camper and location
- Field in Yoho National Park, initially booked as our Lake Louise backup, but we also stayed there for a night after visiting Emerald Lake
I researched which campgrounds accepted our vehicle, noted the different launch dates and prepared multiple options. Then I used several devices on the busiest launch mornings and moved quickly once one received a good queue position.
We did secure the campsites we wanted, although wildfire smoke later forced us to change one of our stays. A reservation provides security, but a Canadian Rockies road trip still benefits from some flexibility.
Changing or cancelling a Parks Canada campsite
You can manage reservations through your account, but changes and cancellations are subject to the current Parks Canada policies and transaction fees.
For frontcountry camping, cancelling sufficiently far ahead normally returns the camping fees but not the original reservation fee or cancellation charge. Later cancellations can also forfeit the first night. These thresholds and amounts may change, so read the current Parks Canada reservation policies rather than relying on an old blog post.
If you’ll arrive late, contact the campground. Under the current frontcountry policy, failing to check in or contact staff by the specified deadline can result in the booking being treated as a no-show and the campsite being released.
Reservations cannot be resold.
My Parks Canada launch-day checklist
Before reservations open:
- Find the correct launch date, time and time zone
- Create and confirm your Parks Canada account
- Test your login
- Check your equipment type and exact vehicle length
- Study the campground map and site descriptions
- Choose several suitable pitches and loops
- Prepare backup campgrounds and dates
- Have your payment card ready
- Open the reservation website before launch
On launch morning:
- Enter the waiting room during the 30-minute window if a queue is being used
- Don’t refresh after receiving a position
- Use multiple devices if you want more than one random chance
- Focus on the device with the strongest position
- Move quickly through your prepared options
- Check the dates, campsite and equipment restrictions before paying
- Keep the confirmation email
If you miss out:
- Try calendar view and neighbouring loops
- Consider splitting the stay across sites
- Search nearby campgrounds or slightly different dates
- Create several Parks Canada availability notifications
- Keep checking for cancellations
- Research first-come, first-served sites without relying on them as your only plan
FAQs about booking Parks Canada campsites
How far in advance can you book Parks Canada camping?
For many national parks, the entire summer reservable season opens on a park-specific launch day in January or February. This differs from a rolling booking window, so check the annual launch schedule.
What time do Parks Canada reservations open?
Many launches open at 8am in the park’s local time zone, while Newfoundland and Labrador launches may use 8:30am. Always check the precise listing for your park because dates and times vary.
Does joining the waiting room early improve your queue position?
No. When a queue is used, everyone present when reservations open is randomly assigned a position. Enter during the 30-minute waiting-room period, but joining at the very beginning of that window doesn’t give you priority.
Can I use several devices in the Parks Canada queue?
We joined on five devices and each received a different random position. This improved our chances of getting a useful queue number, although it didn’t guarantee availability and future systems may operate differently.
Can I book Parks Canada camping by phone?
Yes. The reservation number is currently 1-877-737-3783 within North America and 1-519-826-5391 from outside North America. Telephone transaction fees are generally higher than online fees.
What happens if I don’t get a campsite on launch day?
Use calendar view, try nearby campgrounds and dates, create Parks Canada availability alerts and keep checking for cancellations. Some locations also have first-come, first-served options, but availability isn’t guaranteed.
Does a Parks Canada camping reservation include park admission?
Normally, no. You’ll also need valid national park admission unless a temporary promotion explicitly waives it.
More Canadian Rockies road-trip advice
Save this guide if a Canadian Rockies road trip is on your bucket list. The booking morning may feel like Glastonbury ticket day, but when you wake up surrounded by the Rockies, the stress feels completely worth it.